3 Steps To Load Management
In this blog we will be covering...
• Step 1 | Uploading A Document• Step 2 | Creating A Load• Step 3 | Close The LoadStep 1 | Uploading A Document
• Email [automation email] a load document (Rate Con, BOL, Invoice, Lumper)
• Receive a text to access that document (login if its your first visit)
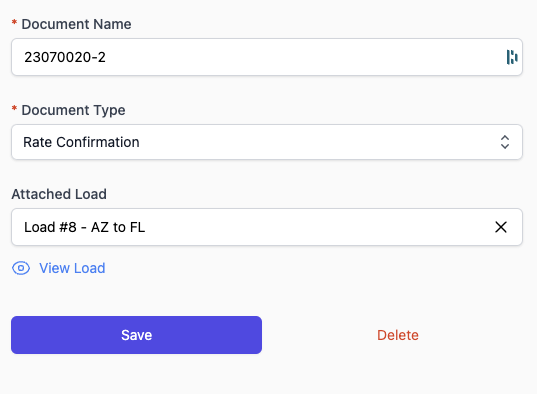
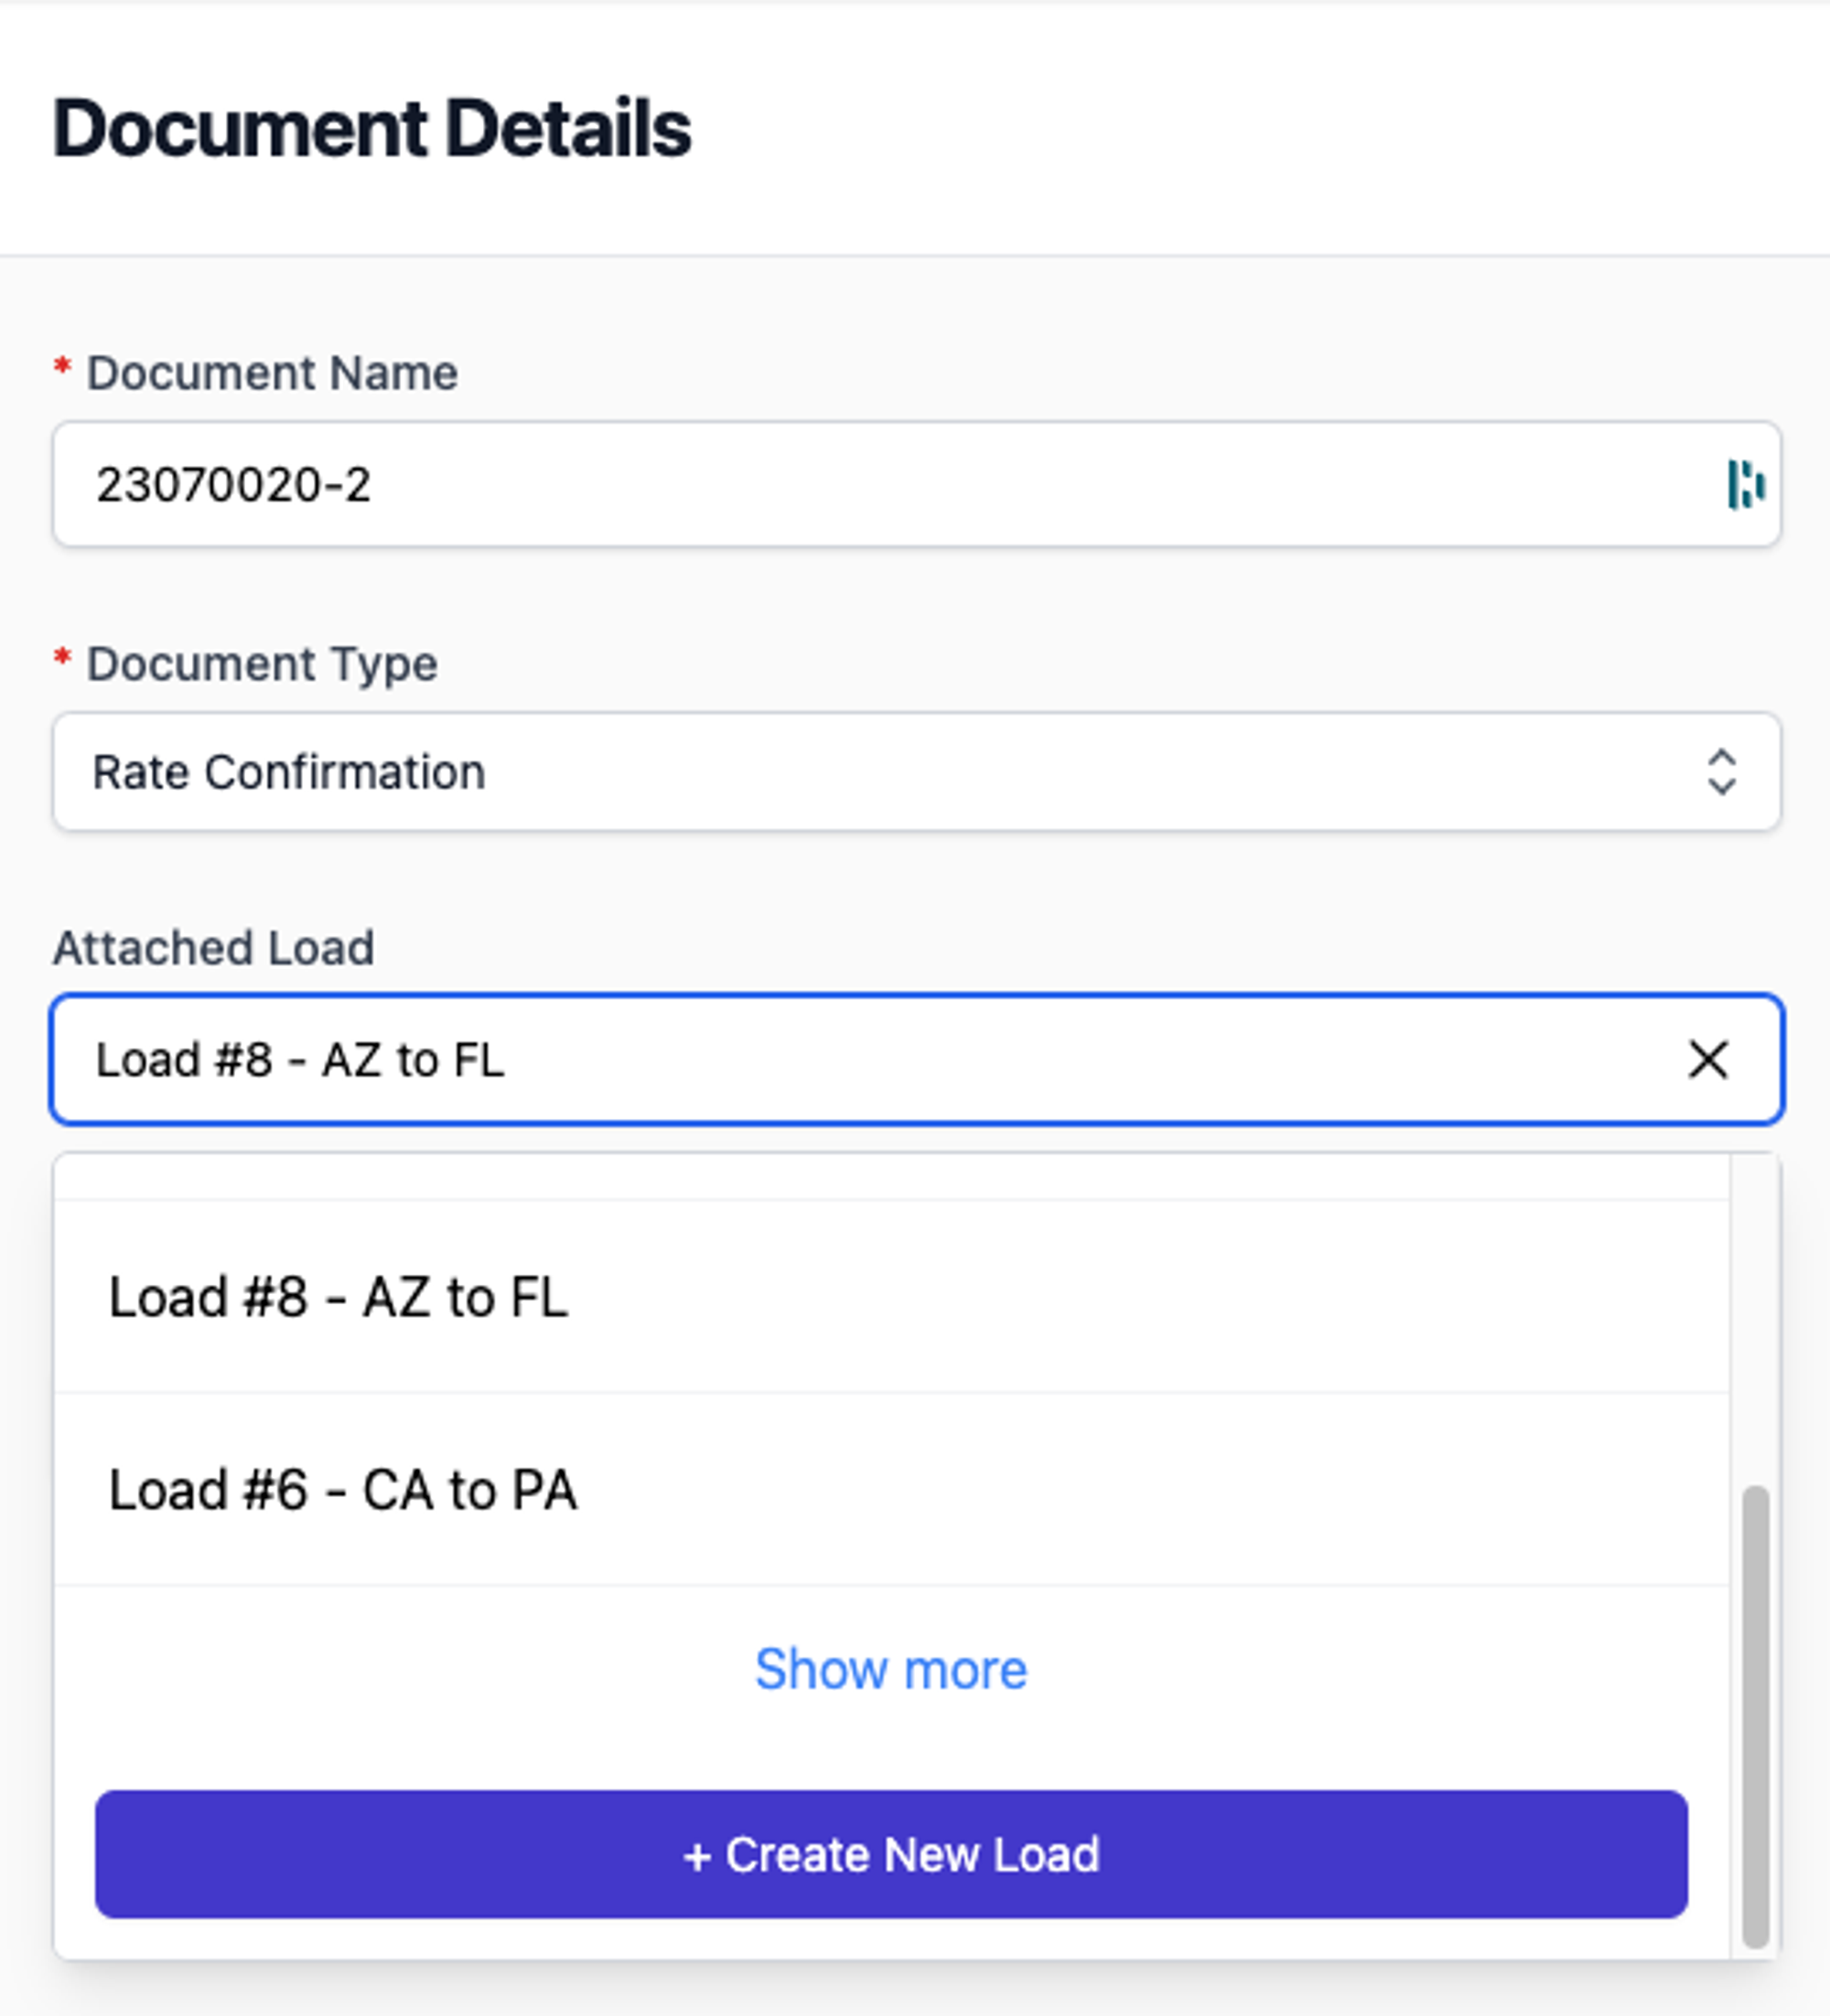
• Name the document, assign the document type, and click create new load (see next step)
• Receive a text to access that document (login if its your first visit)
• Name the document, assign the document type, and click create new load (see next step)
Step 2 | Creating A Load
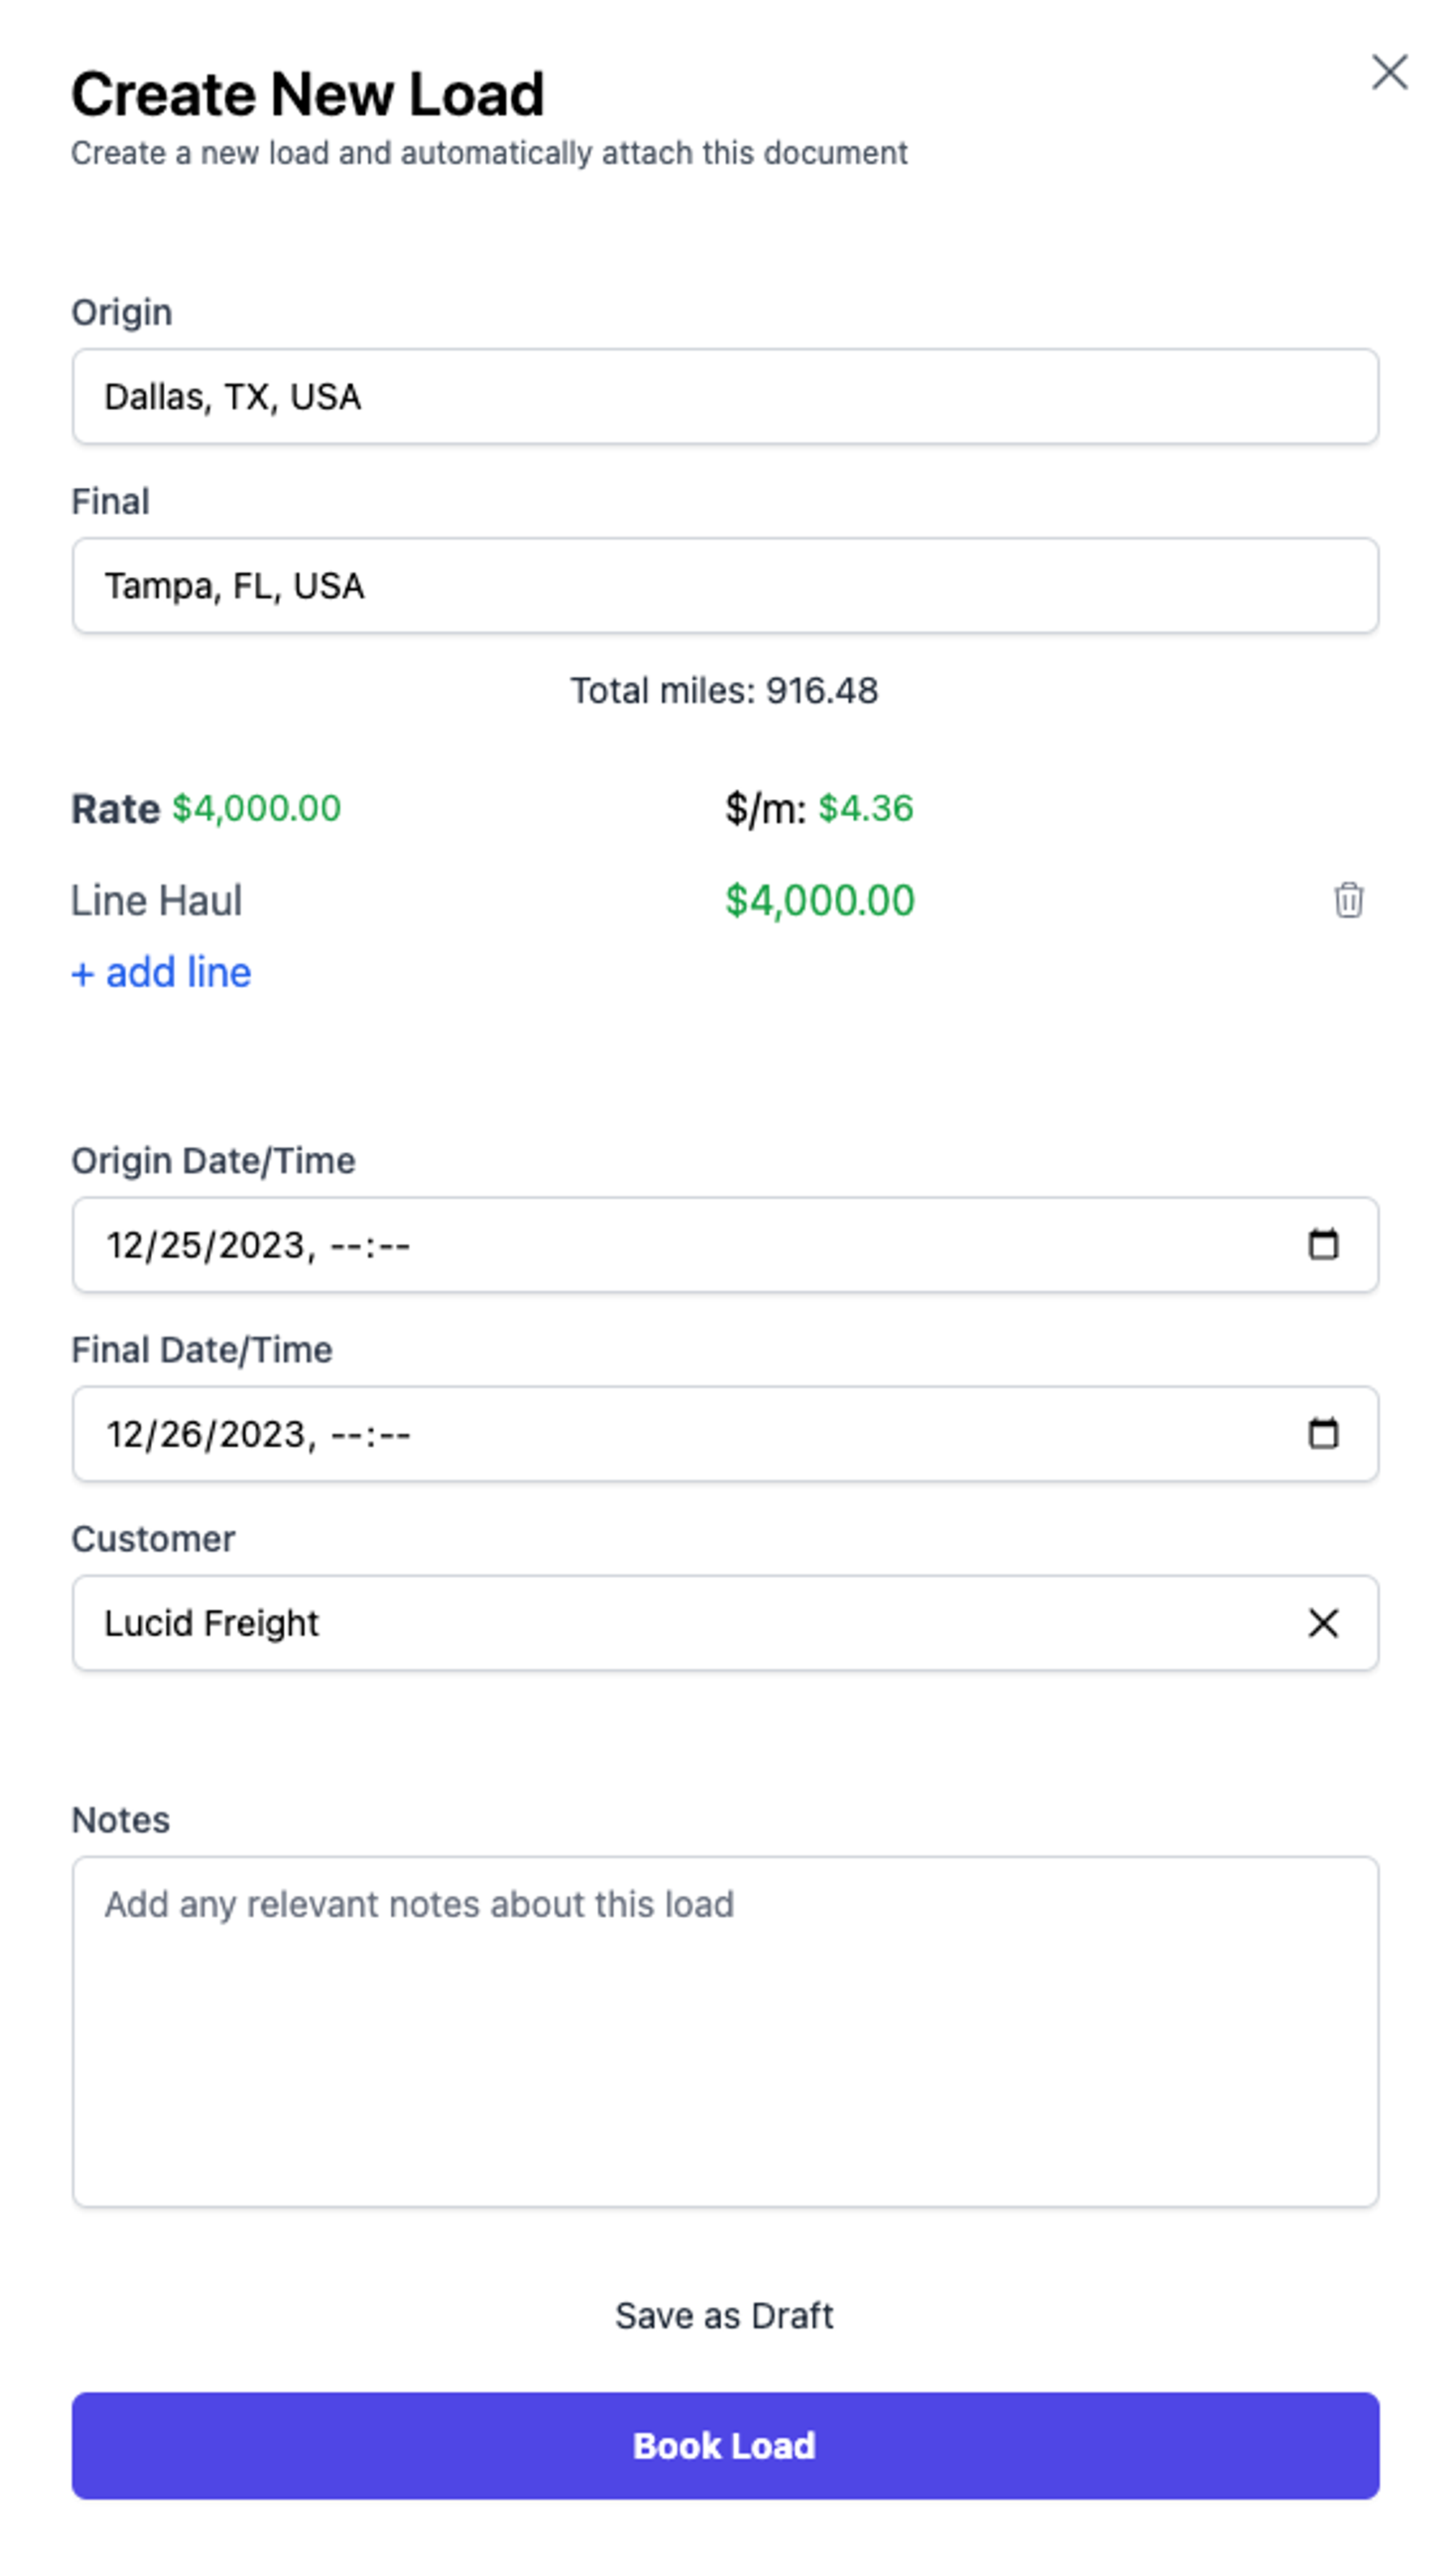
• Add the Origin and Final locations (State to State, city to city, zip to zip or Address Specific)
• Add optional load data like rates, dates, customer (you can always add more later)
• Click Book load! (or save as draft if your waiting for your rate con)
• Add optional load data like rates, dates, customer (you can always add more later)
• Click Book load! (or save as draft if your waiting for your rate con)
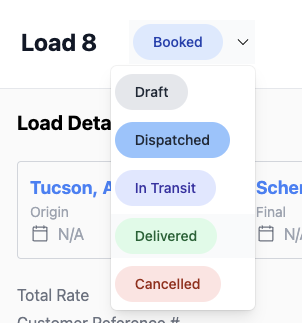
Step 3 | Close The Load
• Upload additional load documents by emailing them to [automation email] like you did in Step #1.
• Attach them to the load you created in Step #2.
• Click Save & Select “View Load” GIF
• Attach them to the load you created in Step #2.
• Click Save & Select “View Load” GIF